AYUCR Camera
The Olympus Hi*Lite is a relatively small and light-weight camera. When
I was searching for a camera for this project I had several criteria.
Light weight - I wanted it to weight less than 8 oz fully loaded.
Small size - I wanted the camera to fit into a 3 tube coupler
Electronic Shutter - I had to be able to activate the shutter electronically
Low Cost - I wasnt sure I was going to be able to successfully modify
the camera. I didnt want to destroy an expensive camera.
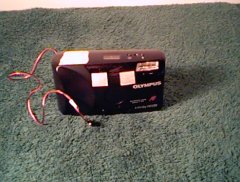 |
| Olympus Hi*Lite 35mm Camera |
After discussing what I was looking for with a very confused and unhelpful
sales-droid who wasnt sure why I cared so much about the electronic shutter
I settled on the Hi*Lite. It fit my criteria and only cost $50. After reading
about the camera several others had used in their camera projects I was
prepared to pay more. The only thing I got that I didnt want was auto
focus. I wasnt sure if the auto focus mechanism would have problems in
flight or interfere with the picture but I was willing to give it a try.
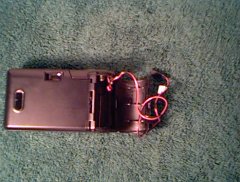 |
| Battery compartment with hole for shutter leads |
The first step in the whole project besides some rudimentary design work
that existed mostly in my head was to see if I could modify the camera
for external shutter activiation. This would require opening the camera
and soldering wires accross the shutter contacts. I was sure this was going
to be difficult and there was the distinct possiblity that I would break
something rendering the camera useless. I proceed cautiously and jotted
down some notes on where things like screws went as I took it apart so
I would be able to get it back together later. After I had gotten the housing
off I identified the shutter contacts on the top side of the camera. They
were exposed traces on a circuit board interlaced very close together.
This would pose a minor problem as they were too close together to solder
to easily. Further investigation also revealed there were three of them,
one common trace, one focus lock trace and one shutter trace. The focus
lock was designed to be activated when the shutter was pressed halfway.
I found that if I connected the focus lock and shutter traces together
I could trip the shutter by shorting them to the common trace. This problem
solved I moved on to soldering leads to these contacts. I ended up scraping
the coating off the circuit board in another location to get at the common
trace. I also scraped away some of the interleaved traces at the shutter
contact point to give me room to solder one wire to the focus lock and
shutter traces without accidentally soldering to the common as well. This
all managed to work.
After a little testing I put the camera back together. This would have
been easier if I had five hands but somehow I managed. The one thing I
didn't try was actually taking some pictures. I guess I was feeling a little
cheap and didn't wan't to waste film. This would come back to haunt me.
On the day of the first flight, at the field, I discovered the camera would
not accept film. When the film door is closed the film is supposed to automatically
advance. This was a real bummer because it delayed the maiden flight. Back
home I discovered that a little film sensing lever had jammed when I reassembled
the camera. Without this level the camera never thinks it has film in it.
Moral: test everything before getting to the flying field.
Incidentally while I had the camera open I also found the flash capacitor.
Actually it found me and after I had stopped drooling and got over the
shock of getting shocked I decided to put some electrical tape over its
leads to protect me from further surprises. If you attept a camera modification
such as this I recommend you do the same. Im not sure if this kind
of shock can be lethal but why take chance?